
How to Install a Venturi Injector onto a Faucet
A2Z Ozone's venturi injectors are meant to be used in tandem with an ozone generator to make ozonated water. In this example, we connect the venturi injector to a regular faucet.
The PVDF Venturi Injector
Use a PVDF venturi injector with any of our products to create a vacuum effect during the ozone water application. You can pair the PVDF venturi injector with any of our generators. You will need the venturi injector to get the SP-Series (Swimming Pool Ozone Generators) and the Aquatic-Series (Spa Ozone Generators) to work.
Mixing Liquids
Actually, you can mix any additive material that you need in an application. The process of using the PVDF venturi injector combines two different substances to create a fluid mix of the two, then releases the combined products through the outlet side.
Size Down for Vacuum
In order to create the vacuum, use a half-size down from your piping. For example, we recommend using the 3/4" with a 1.5" PVC pipe.
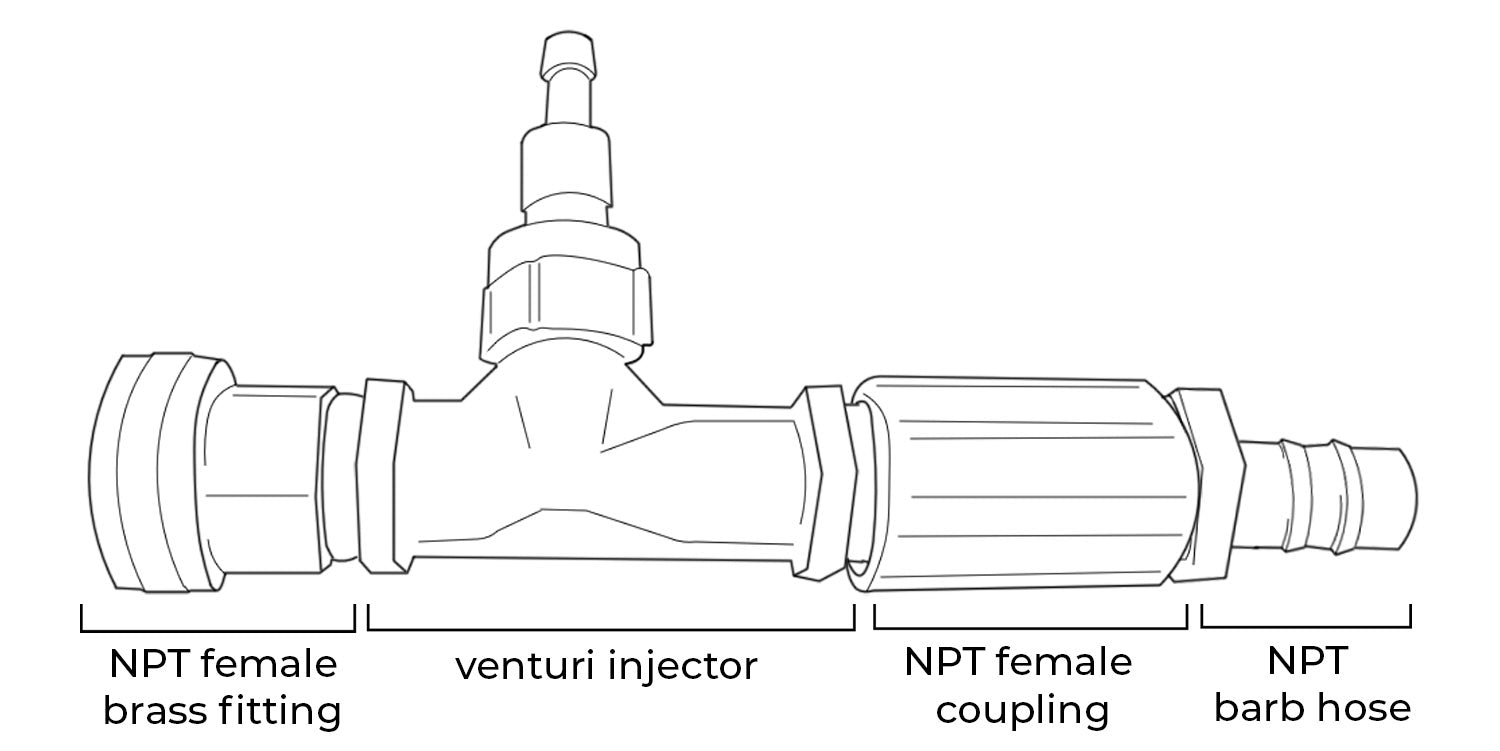
Parts you will need:
- .5” x .5” NPT female brass fitting
- .5” venturi injector
- .5” NPT female coupling
- .5” x 3/8” NPT barb hose
- Optional: Plumber's tape, for durability
Purchase an A2Z Ozone PVDF Venturi Injector.
-
Assemble the pieces to the venturi injector (as seen above)
-
Screw the NPT female brass fitting onto your faucet
-
Test your connection by placing your finger over the top barb of the venturi injector itself. Water should flow smoothly out the bottom of the NPT barb hose.
-
Then you can connect your hose (or whatever you are connecting) to the NPT barb hose.
- After you have completed the steps above, connect an appropriately sized tube/hose to your ozone generator.
- Connect the tubing from your ozone generator to the top barb of the venturi injector.
- Cut your tubing into two pieces
- Connect a piece of tubing to each end of the check valve
- The arrow on the check valve should follow the flow of ozone. This means the arrow faces away from the water ozone generator.